
As winter gives way to warmer temperatures, pool owners face the annual task of preparing their swimming pool for the season ahead.
A methodical approach to spring pool opening saves time, reduces chemical costs, and prevents equipment damage.
By following a structured sequence of steps, homeowners can avoid common mistakes that lead to algae blooms, pump failures, and costly repairs.
Remove and Clean the Pool Cover
The first step is removing the winter cover without letting accumulated debris enter the water.
Use a cover pump or wet-dry vacuum to remove standing water, then sweep off leaves and dirt with a soft broom or leaf rake.
Carefully remove the cover, rinse it with a hose, and allow it to dry completely in the sun before folding and storing it in a cool, dry place.
Proper cover storage prevents mold growth and extends the life of the cover for the next winter season.
Inspect the Pool and Surrounding Area
With the cover removed, examine the pool surface for cracks, staining, or algae growth that may have developed over the winter.
Check the deck and coping for damage, and ensure that skimmer baskets, return fittings, and drain covers are intact and properly seated.
Look for signs of freeze damage such as cracked pipes or fittings, especially if the winter was particularly harsh. Address any issues now before proceeding with the startup.
Fill the pool with water until the level reaches the midpoint of the skimmer opening.
This height allows the skimmer to function properly and prevents the pump from drawing air.
If the water level is too low, the pump may lose prime and run dry, which can damage the mechanical seal.
Reconnect and Prepare Pool Equipment
Reinstall any equipment that was removed or winterized.
This includes drain plugs in the pump, filter, and heater, as well as pressure gauges and return fittings.
Remove winterizing plugs from skimmers and return lines, and reinstall regular drain plugs using Teflon tape on the threads to prevent leaks.
Inspect all hoses, pipes, and connections for wear or damage.
Lubricate O-rings and gaskets with a silicone-based lubricant—never use petroleum-based products, which cause rubber to swell and deteriorate.
Prime the System and Check for Leaks
Before starting the pump, fill the strainer housing with water to prevent the pump from running dry. Secure the lid and turn on the system.
Priming may take several minutes depending on the pump model and suction lift.
As the system runs, check for leaks at all unions, valves, and fittings.
Listen for unusual noises and verify that water flows properly through the return jets.
Allow the system to circulate for several hours while monitoring performance.
Clean, Brush, and Vacuum the Pool
Even with a cover, some debris typically finds its way into the pool during winter.
Use a skimmer net or deep-bag leaf rake to remove floating leaves and twigs.
Brush the walls, floor, steps, and corners to loosen dirt and algae spores that adhered to surfaces.
Follow with a thorough vacuuming of the pool floor to remove settled debris.
Brushing is especially important because it breaks the protective biofilm that algae forms, making the water more responsive to sanitizers.
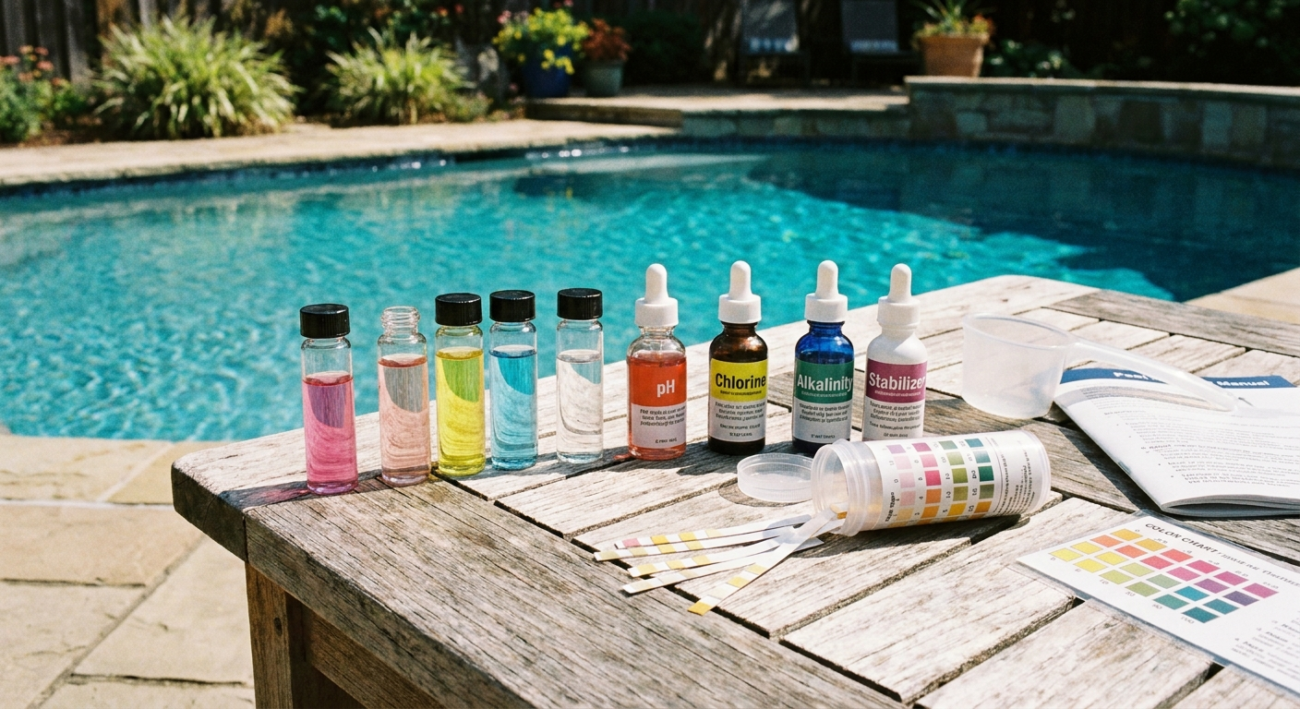
Test and Balance Water Chemistry
Proper water chemistry is the foundation of a safe and clear pool. Use a reliable test kit or test strips to measure the following levels:
- pH: 7.2 to 7.6
- Total alkalinity: 80 to 120 ppm
- Calcium hardness: 180 to 400 ppm
- Free chlorine: 1 to 3 ppm
- Cyanuric acid (stabilizer): 30 to 50 ppm
Always balance total alkalinity first, then adjust pH.
Low calcium hardness can cause water to become aggressive and etch plaster surfaces, while high calcium can lead to scaling on heater elements and salt cells.
If the water appears cloudy or shows signs of algae, a shock treatment will be needed after balancing.
Shock Treatment and Ongoing Maintenance
After balancing the water chemistry, apply a shock treatment to eliminate bacteria, chloramines, and algae that may have developed over winter.
Shock in the evening to prevent UV degradation, and run the pump overnight to circulate the treatment.
Wait until the chlorine level drops below 5 ppm before swimming.
For pool owners who prefer a structured reference, a comprehensive spring pool opening checklist can help track each step and ensure nothing is overlooked during the startup process.
Establish a regular chlorination routine once the water is balanced and clear. Three-inch trichlor tablets placed in a floating dispenser or inline chlorinator provide steady sanitizer release throughout the season. Monitor chemical levels weekly and adjust as needed to maintain balance.
Inspect Safety Features
Before allowing swimming, verify that all safety equipment is in working order.
Check that ladders and handrails are securely fastened and free of corrosion.
Test pool lighting, ensure that gates and latches function properly, and confirm that safety covers and alarms are operational.
A safe pool environment protects both family members and guests throughout the swimming season.
Final System Run and Seasonal Readiness
Allow the pool system to run continuously for 24 to 48 hours after the initial chemical treatment.
This circulation helps filter out remaining debris, distribute chemicals evenly, and stabilize water clarity.
Continue testing and adjusting chemical levels as needed during this period.
Once the water is clear and balanced, the pool is ready for use.
A systematic approach to spring pool opening reduces the likelihood of equipment damage, minimizes chemical waste, and ensures that the pool is safe and enjoyable from the first swim onward.
By following these steps each season, homeowners can extend the life of their pool equipment and maximize their time in the water.